If you are an ice cream lover, this easy dessert is for you! It’s easy to make and a total crowd pleaser that's perfect for any occasion. In our house, this Ice Cream Sandwich cake is a huge hit and my kids ask for it often! It is also so much fun to make with the kids! They love to assemble the ice cream sandwiches and see how the cake comes together.
Check out all my ice cream recipes to make throughout the Summer!
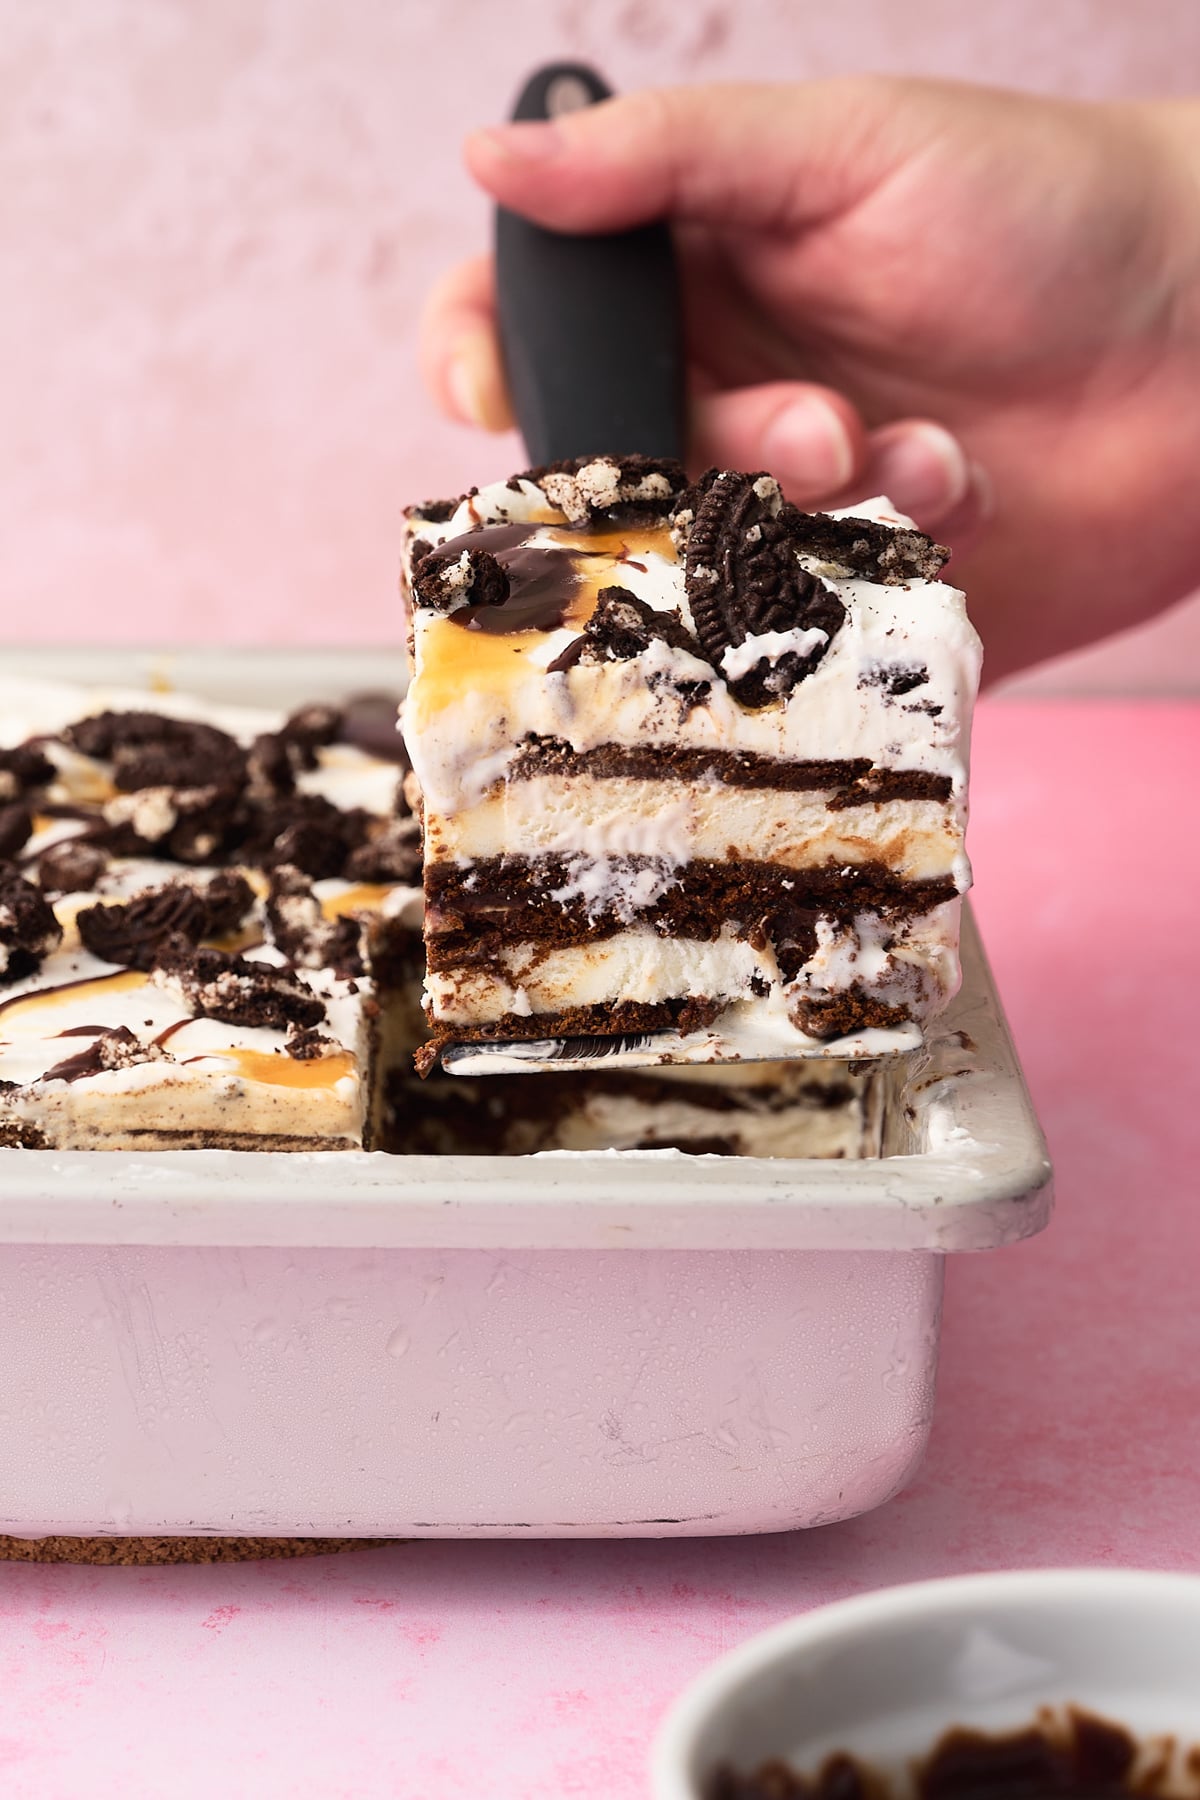
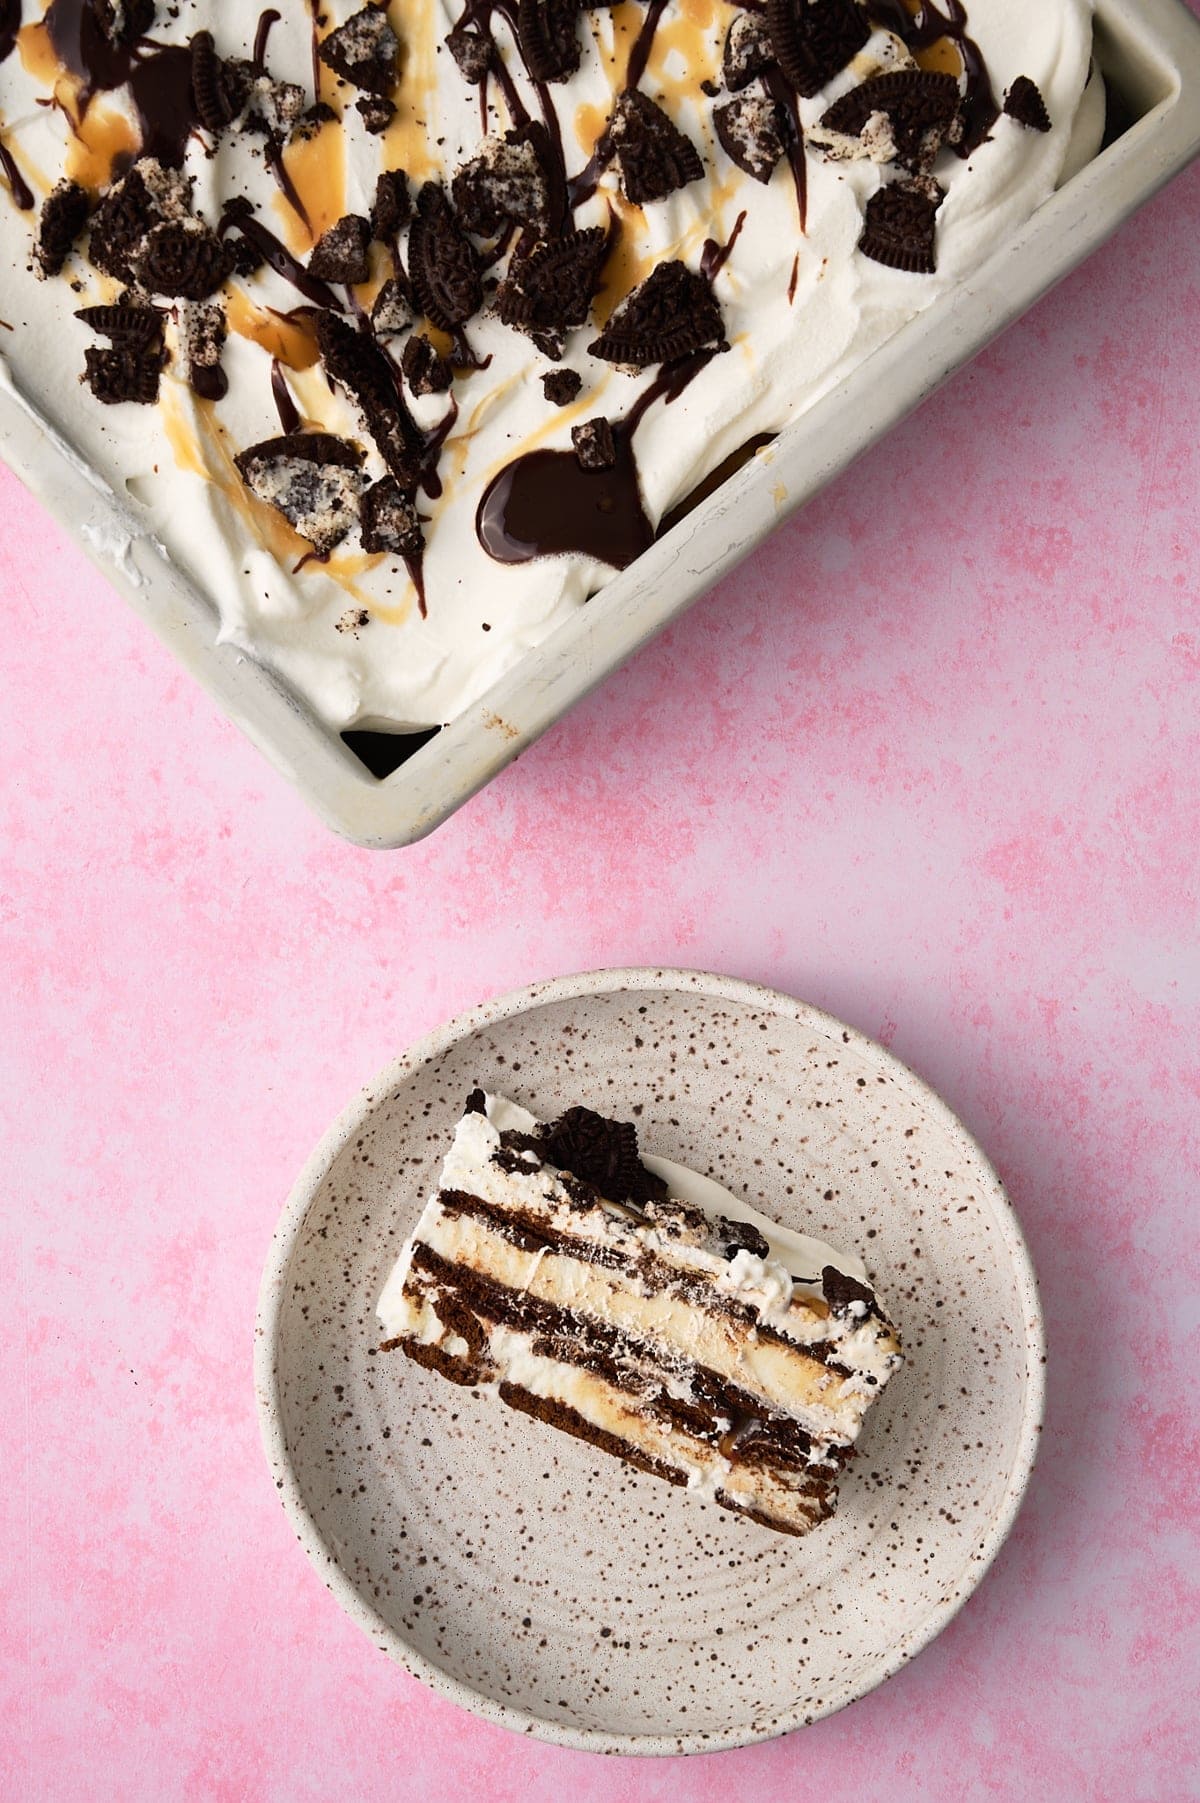
Who doesn't love ice cream sandwiches and a good old fashioned ice cream cake? Why not put them both together and have this delicious ice cream sandwich cake!
My family loves this recipe because it’s the perfect mix of soft, creamy, and just the right amount of sweet. The ice cream sandwiches stay perfectly tender, and the layers make every bite a little different (which my kids are obsessed with)!
This is the perfect recipe to make ahead of time and keep in your freezer! When the kids are yelling for something from the ice cream truck, break out this cake instead! It's got layers of ice cream sandwiches, creamy whipped topping, and fun toppings like m&m bits, oreos, sprinkles, or whatever you have on hand! It’s one of those desserts that disappears fast and gets requested again and again.
Jump to:
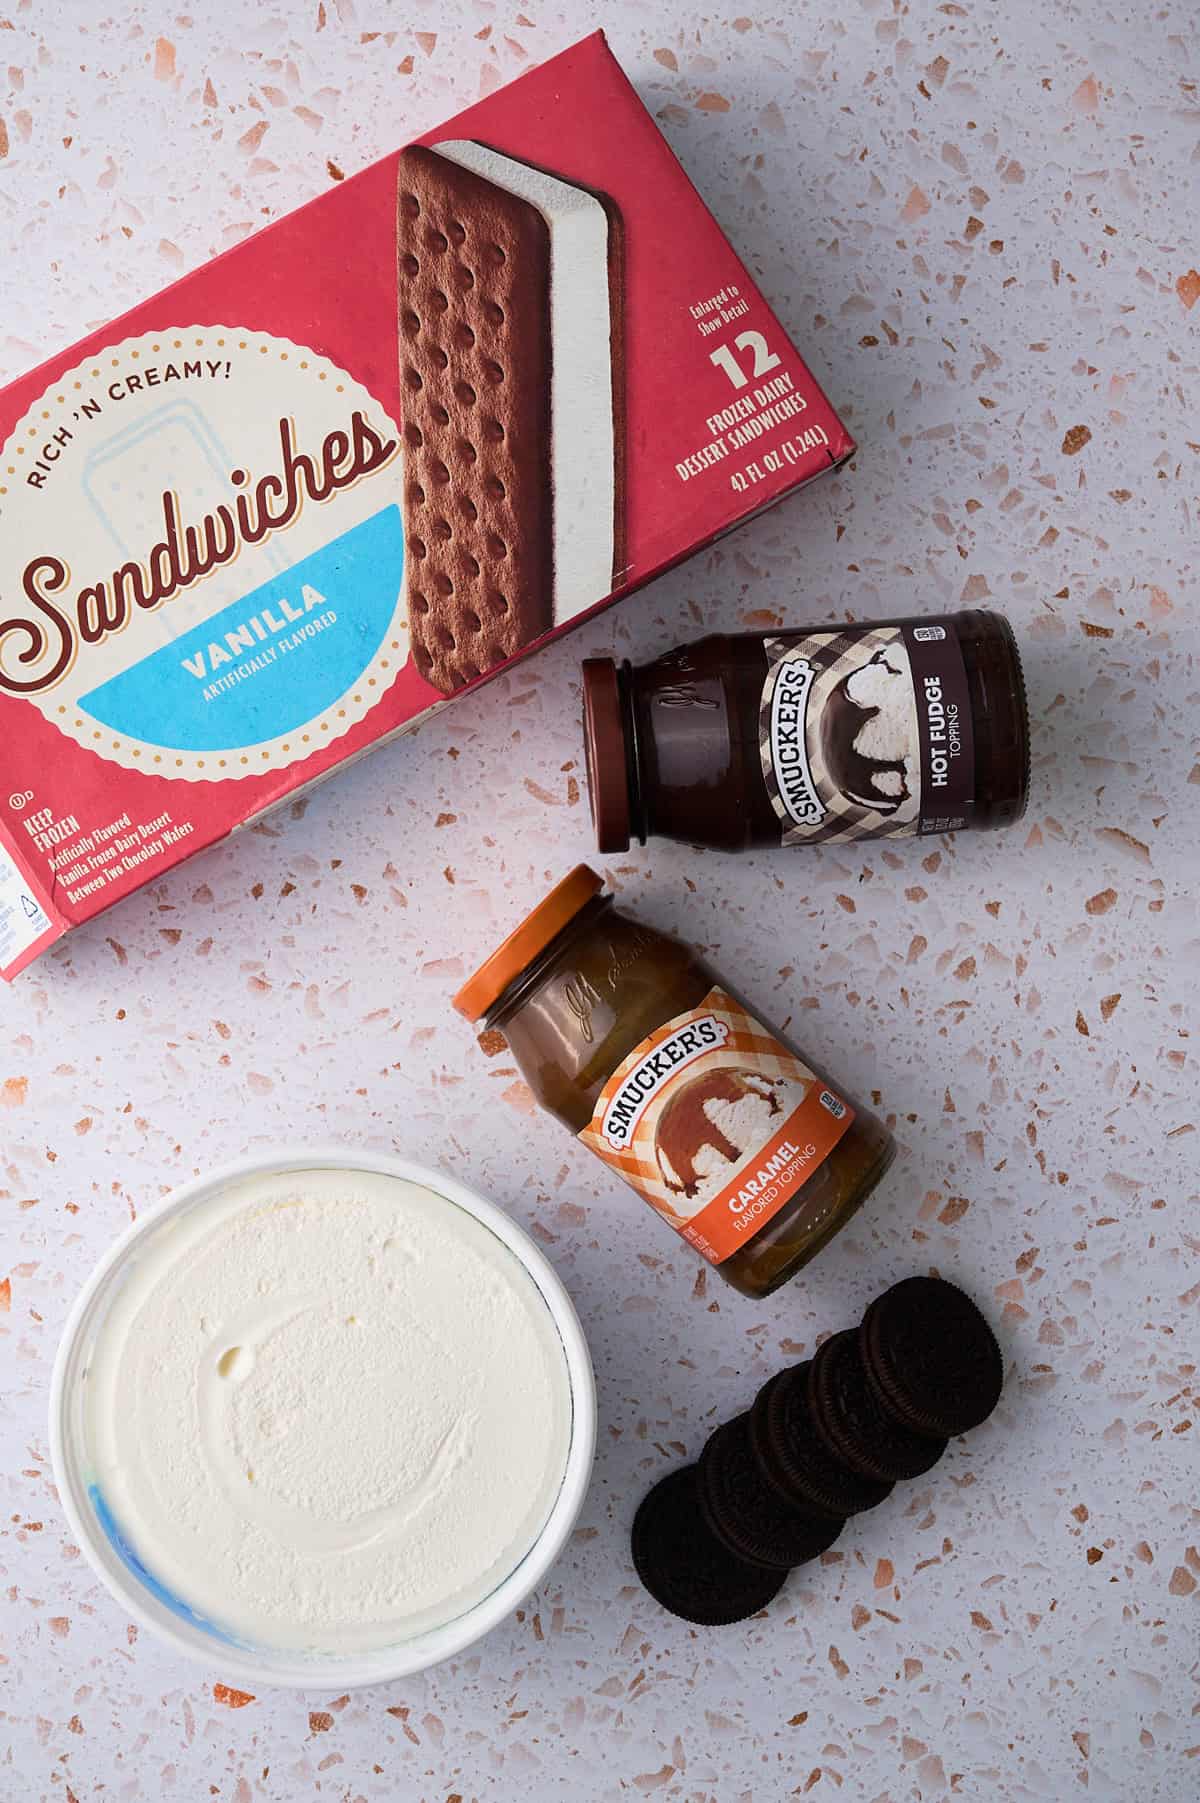
Ingredients to Make Ice Cream Sandwich Cake
- Ice Cream Sandwiches - Chose your favorite brand from the grocery store. You can also chose whichever flavor you prefer. Any variety would make a delicious ice cream cake!
- Whipped Topping - Use your favorite kind of whipped topping (like cool whip) and make sure that it is thawed. If you don't like using whipped topping, feel free to make your own homemade whipped cream in place of cool whip.
- Hot Fudge Sauce - Any brand you like will work great! Warm it slightly in the microwave to make sure its easy to spread.
- Caramel Sauce - The caramel sauce adds a layer of sweetness and will help the cake stay together.
- Cookies, Sprinkles, or Chopped Candies - Feel free to be creative with your toppings and try different combinations each time you make it! I like to use m&m's because they are my favorite candy, but you can use whatever you want, even chopped walnuts or chopped pecans!
Be sure to check out the printable recipe card for full recipe information on ingredients and quantities.
Substitutions and Variations
- Use homemade whipped cream! Use 1 cup cold heavy cream, 2-3 tablespoons of powdered sugar and a splash of vanilla. Beat everything on medium speed until it starts to thicken.
- Switch up the Sauces! You could substitute the caramel sauce for peanut butter sauce if you have peanut butter lovers in your house! Strawberry sauce could also be used to change things up!
- Change the toppings! You can use pretzels (for a salty crunch!), mini chocolate chips, chopped candy bars (Reeses, Snickers, etc), or toasted coconut. The combinations are never ending!
- Change the pan! Switch up the pan shape to make your dessert extra interesting. You could use a loaf pan, springform pan or any fun shapes you may have for different occasions.
How To Make No Bake Ice Cream Sandwich Cake
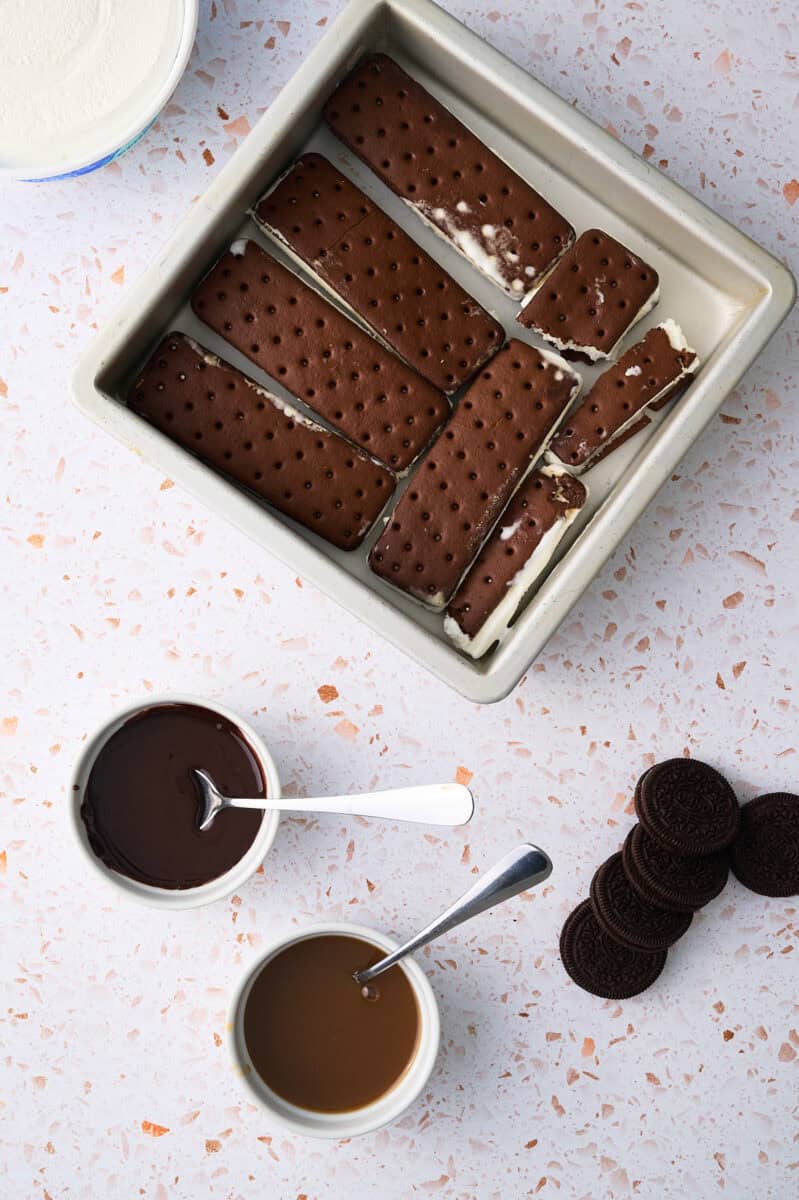
Step 1
Place 6 unwrapped ice cream sandwiches side by side in a 9x13 baking dish. A 9-inch pan makes the perfect size cake!
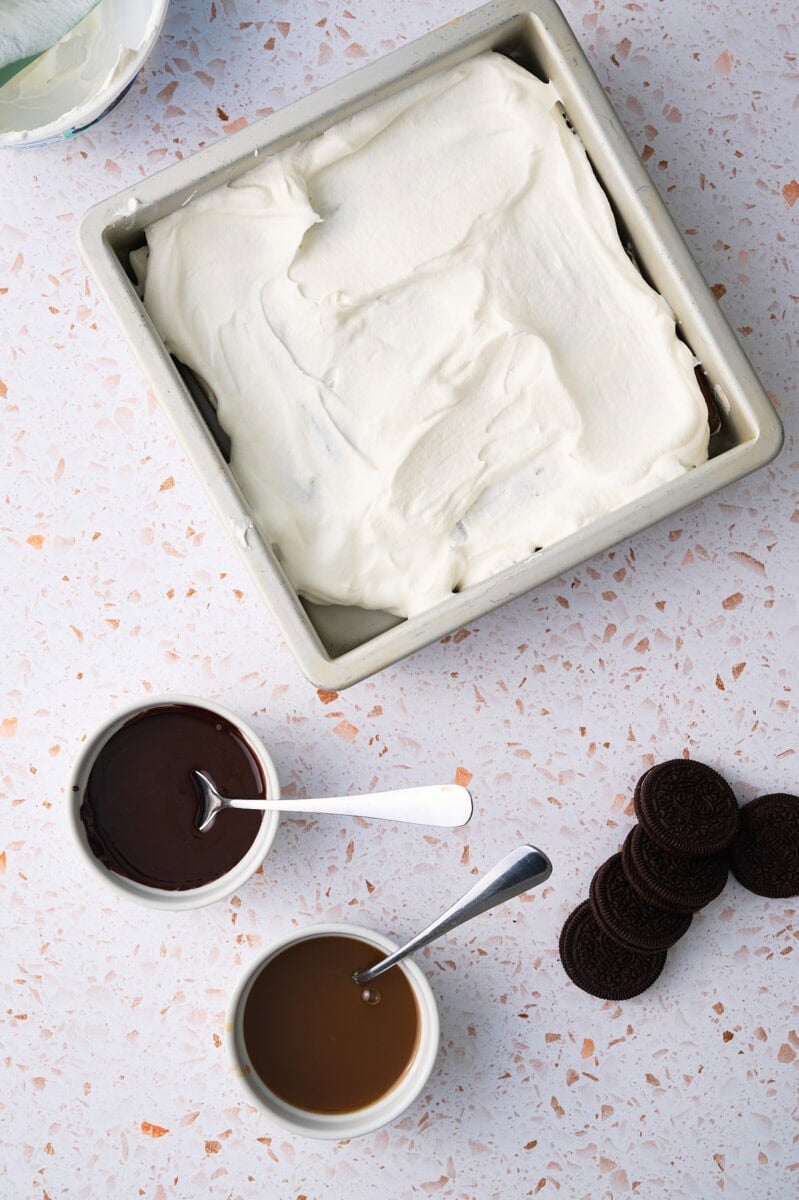
Step 2
Spread half the whipped topping over the ice cream sandwiches.
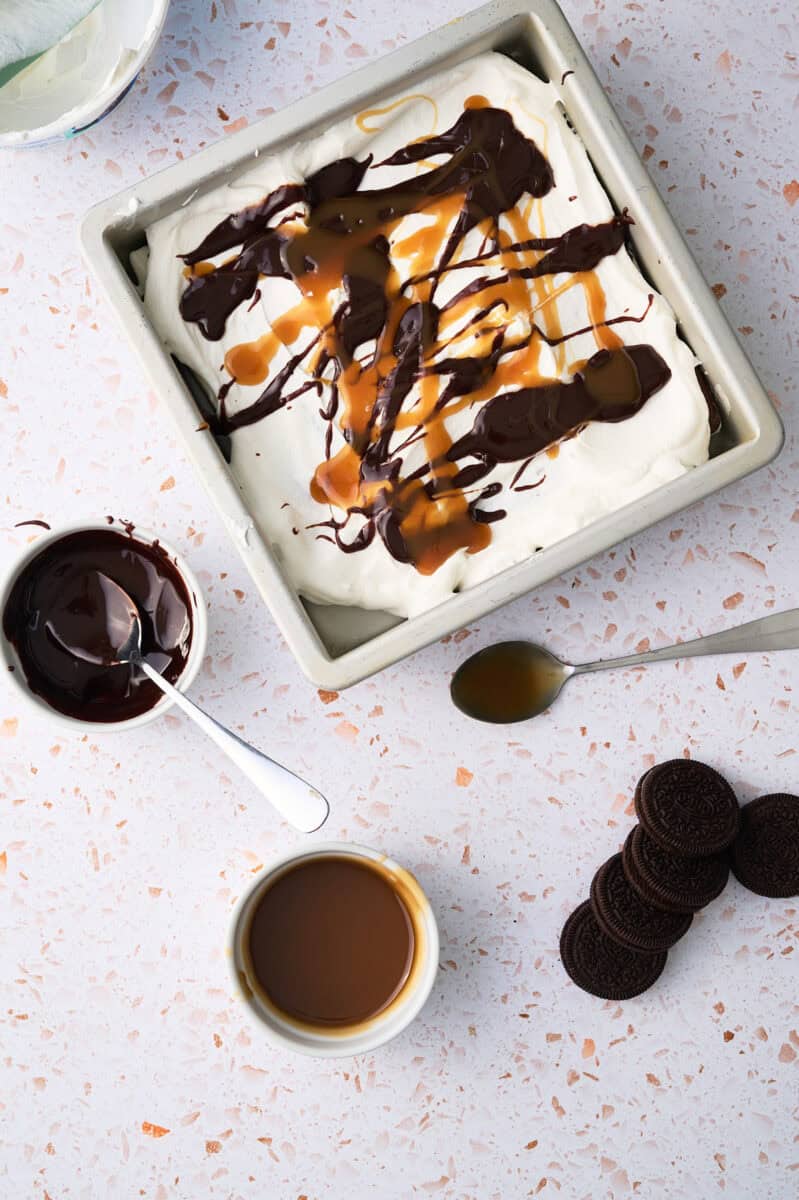
Step 3
Drizzle the hot fudge and caramel sauce over the ice cream sandwiches and whipped topping.
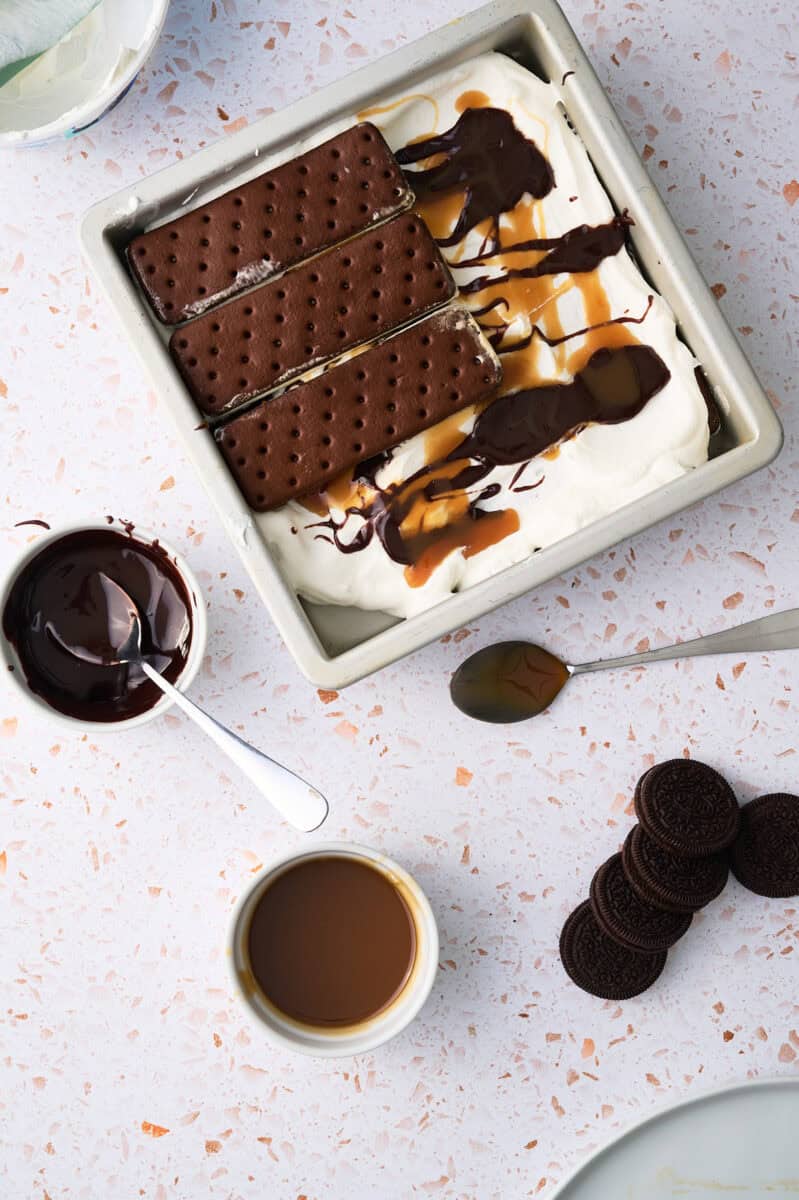
Step 4
Place another 6 unwrapped ice cream sandwiches on top to create another layer. Top with the rest of the whipped topping and drizzle hot fudge and caramel sauce. Sprinkle candy or cookies or sprinkles over your cake. Cover your cake loosely with foil and place in the freezer for 3-4 hours. This will allow the cake to firm up.
Tips and Tricks
- Work Fast! Ice cream sandwiches tend to melt quickly, so make sure you have everything ready once you start to assemble.
- Even layers matter! Spread the whipped topping smoothly so the cake freezes flat and is easier to store and serve.
- Softened sandwiches help! When assembling the cake, if the sandwiches are slightly soft, they will fit easier into your pan. If they are too frozen, they can crack when pushed into the pan.
Storage Instructions
Cover your cake loosely with foil or plastic wrap before freezing. Freeze for at least 3-4 or overnight before serving. Place leftovers back in the freezer ASAP so that the layers do not fall apart. Your ice cream sandwich cake will stay in the freezer for 1-2 weeks.
Frequently Asked Questions
Absolutely! It can be made 2-3 days ahead of time if tightly wrapped in the freezer. Add final toppings right before serving for the best presentation.
Make sure the plastic wrap touches the top of the cake to avoid freezer burn. Avoid thawing and refreezing the cake
Yes! Just use gluten free or dairy free ice cream sandwiches and dairy free whipped cream. Choose the brands that you enjoy the most from the grocery store.


Ice Cream Sandwich Cake (Only 5 Ingredients!)
Equipment
- 9x13 inch baking sheet
Ingredients
- 12 Ice Cream Sandwiches
- 8 oz Cool Whip or your favorite whipped topping
- ½ cup Fudge sauce
- ½ cup Caramel sauce
- ½ cup Crushed cookies, sprinkles, or candies
Instructions
- Place 6 ice cream sandwiches side by side in a 9x13-inch baking dish or on a foil lined tray.
- Spread half the whipped topping over the sandwiches, then drizzle with hot fudge and caramel.
- Add another layer of 6 ice cream sandwiches, then top with the rest of the whipped topping. Drizzle more fudge/caramel and sprinkle with crushed cookies, sprinkles, or candy if you would like.
- Cover loosely with foil and freeze it for 3-4 hours. When you are ready to serve it, let the
Notes
- Make a big batch! You can easily double or triple this recipe just as long as the pan is big enough.
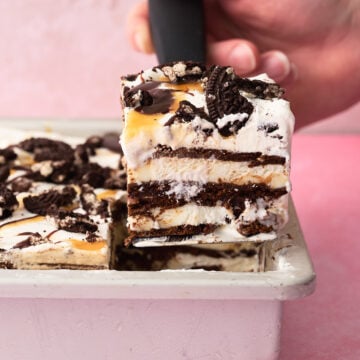
- Let it soften slightly before slicing! Take the cake out of the freezer 5–10 minutes before serving for clean, easy slices.
- Use a hot knife! Run your knife under warm water and wipe dry between cuts for neat layers.
- Customize the layers! Swap in different toppings like crushed cookies, caramel, or peanut butter for fun variations.
- Make it ahead! This dessert freezes beautifully, so you can prep it a day or two in advance for stress-free serving!

Leave a Reply